The TextPlus Custom ActiveX Control
|
The TextPlus Custom ActiveX Control and associated test application are included when you purchase the Visual Basic 6 Tutorial Download Package or the Visual Basic 6 "Extra" Sample Applications from The VB Programmer. |
The TextPlus control is an ActiveX control that I developed several years ago. The TextPlus control is an enhanced textbox that contains features (properties) that I thought a textbox should have. By setting these various properties, I was able to save myself a lot of coding.
A standard VB textbox was used as the basis for the TextPlus control, and as such, the TextPlus control retains most of the properties and events of the standard textbox. However, in addition to the standard properties, the TextPlus control contains the following properties:
|
Property Name |
Data Type |
Description |
|
Autotab |
Boolean |
Determines whether or not the next control in the tab order will receive focus when the number of characters entered reaches the value of the MaxLength property. Applicable only when MaxLength is non-zero. |
|
CustomFormat |
String |
A valid VB custom numeric format string (such as "##,##0.00"); applies only when the DisplayFormat property is set to "6 – UseCustomFormat". |
|
DisplayFormat |
Long (Enumerated) |
A format to be used on a numeric field when it does not have the focus. Applies only when the Numeric property is set to True. Possible values are: 0 – GeneralNumberFormat (default) 1 – CurrencyFormat 2 – FixedFormat 3 – StandardFormat 4 – ScientificFormat 5 – PercentFormat 6 – UseCustomFormat |
|
ErrorChar |
String |
The character used to fill the control when the incoming data violates the property settings for the control and the error action properties (SizeErrorAction and/or FilterErrorAction) are set accordingly. The default error character is "*". |
|
Filter |
String |
The set of valid characters that can be entered into the control (such as "0123456789", "ABCDEFGHIJKLMNOPQRSTUVWXYZ", etc.). |
|
FilterErrorAction |
Long (Enumerated) |
Action to be taken when the incoming data (such as that being read in from a file) violates the Filter property setting. Possible values are: 0 – FilterErrDisplayAsIs (default) 1 – FilterErrDisplayWithErrorChar |
|
MaxDigsAftDec |
Integer |
Applicable only when the Numeric property is set to True, this is the maximum number of digits that may be entered after the decimal point. |
|
MaxDigsBefDec |
Integer |
Applicable only when the Numeric property is set to True, this is the maximum number of digits that may be entered before the decimal point. |
|
Numeric |
Boolean |
When set to True, only a leading sign, digits, and a decimal point may be entered into the control. The maximum number of digits that may be entered before and after the decimal point are determined by the MaxDigsBefDec and MaxDigsAftDec properties, respectively. |
|
SelectOnFocus |
Boolean |
When set to True, the text in the control will be selected (highlighted) when the control receives focus. |
|
SizeErrorAction |
Long (Enumerated) |
Action to be taken when the incoming data (such as that being read in from a file) violates the size-related property settings established for the control (such as MaxLength, MaxDigsBefDec, and MaxDigsAftDec). Possible values are: 0 – SizeErrDisplayTruncated (default) 1 – SizeErrFillWithErrorChar 2 – SizeErrDisplayAsIs |
|
UpperCase |
Boolean |
When set to True, alphabetic characters entered into the control will be converted to upper-case. |
|
UnderlyingValue |
Variant, Read-Only |
The underlying value of the data displayed in the textbox. Applicable when a numeric field uses formatting: While the Text property contains the value plus any characters introduced by formatting (such as a comma or dollar sign), the UnderlyingValue property contains just the raw data. |
Remarks:
· By setting SelectOnFocus to True, you can eliminate the coding of a GotFocus event to select the text in the textbox.
· By setting AutoTab to True, you can eliminate the coding of logic in the Change event that monitors the text's length and sets focus to the next control when the maximum length has been reached.
· By using the Filter property (possibly in conjunction with the UpperCase property), you can eliminate logic in the KeyPress event that monitors keystrokes. The Filter property is recommended for basic text / alpha entries as well as whole number numeric fields (such as an account number or zip code).
· By using the Numeric property (usually in conjunction with the MaxDigsBefDec and MaxDigsAftDec properties), you can precisely control the entry of numeric values without tricky logic in the KeyPress and Change events.
Once you have downloaded and unzipped the files (upon purchase of the e-book), there will be a folder with the path:
[Your Download Directory]\VB6TUTS\Extras \X14_TextPlus_Custom_Control
In that folder, you will see:
· the TextPlus.ocx file
· the TextPlusTester folder
· the TextPlusControl folder
The usage of each of these will be discussed in turn.
The TextPlus.ocx File
This is the compiled version of the TextPlus control. To use the TextPlus control (TextPlus.ocx) in your VB projects, you must register the control using the Windows utility program REGSVR32.EXE, as follows:
1. It is recommended that you COPY the TEXTPLUS.OCX file into the Windows system directory (by default, on Windows 95, 98, ME, and XP this would be "C:\WINDOWS\SYSTEM"; on Windows NT and 2000 it would be "C:\WINNT\SYSTEM32"). This is only a recommendation. Just be aware of the location of the TEXTPLUS.OCX, making sure that it is in a location from which you are not likely to move it.
2. On the Windows taskbar, click the Start button, then click Run. In the Run dialog textbox, enter:
REGSVR32 path\TEXTPLUS.OCX
where path is the directory to which you copied the TEXTPLUS.OCX file. If you followed the recommendation above, the command would look like this:
(on Windows 95, 98, ME, or XP): REGSVR32 C:\WINDOWS\SYSTEM\TEXTPLUS.OCX
(Windows NT or 2000): REGSVR32 C:\WINNT\SYSTEM32\TEXTPLUS.OCX
3. Windows should respond with a message indicating that the control was registered successfully.
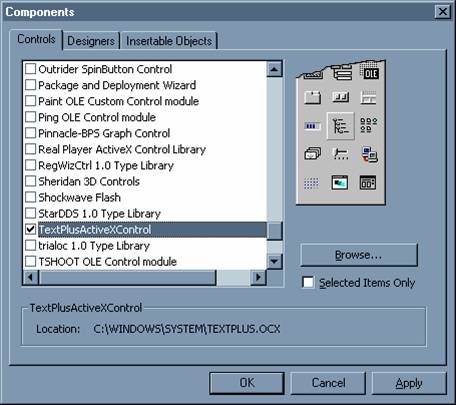
From this point on, any time you want to use the TextPlus control in a VB project, go the VB menu and click Project, then Components. Scroll down until you see "TextPlusActiveXControl", check its box, then click OK:
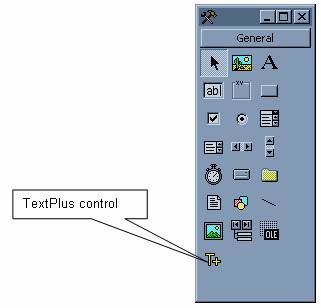
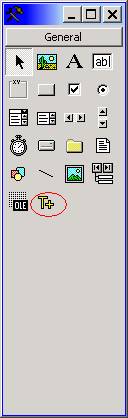
Once you click OK, the TextPlus icon will appear in your toolbox, and you can use it in your project just like any other control:
The TextPlusTester File
The "TextPlusTester" folder contains a project that demonstrates various features of the TextPlus control. In order to run this project, you must first register TextPlus.ocx on your system, as described in the steps above
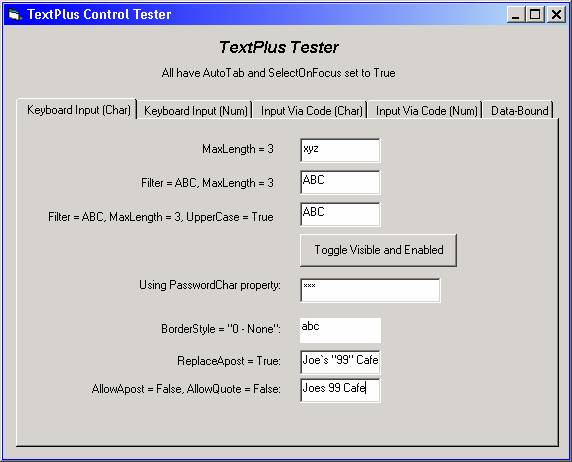
Shown below are some screen shots of the "TextPlus Tester" project.
The first tab demonstrates the behavior of properties such as Filter and UpperCase when entering alpha data:
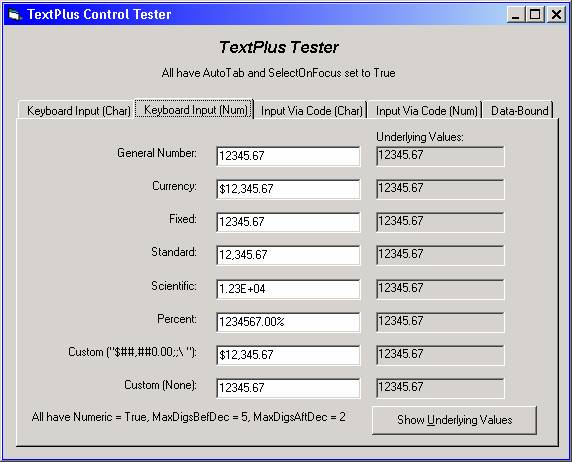
The second tab demonstrates the behavior of numeric fields with a DisplayFormat property applied:
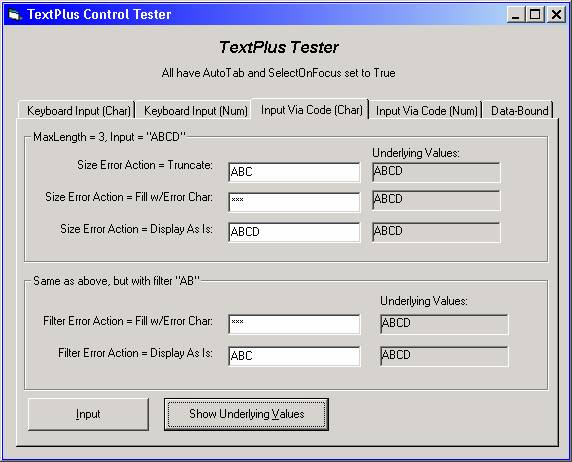
The third tab demonstrates the behavior of various properties when alpha data is entered into the textboxes via code:
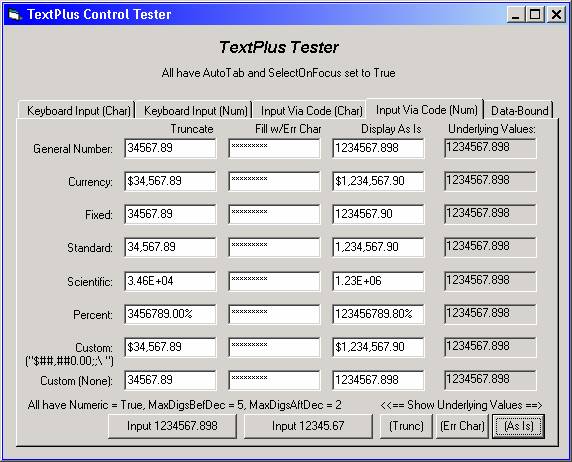
The fourth tab demonstrates the behavior of various properties when numeric data is entered into the textboxes via code:
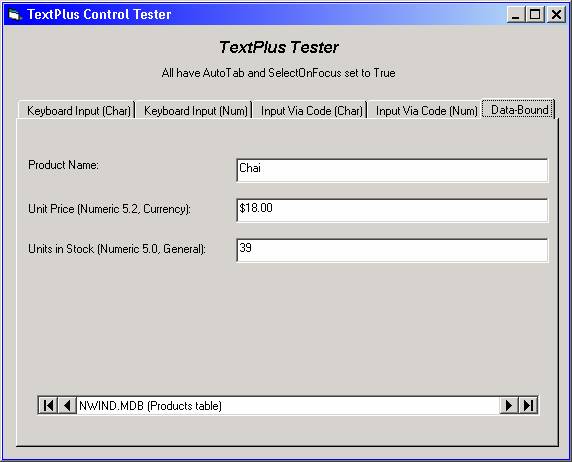
The last tab shows that the TextPlus control can be data-bound:
The TextPlusControl Folder
The "TextPlusControl" folder contains the project for the control itself (that when compiled creates the OCX). If desired, you could make modifications to the control and recompile it. Or, if you prefer, you could include the uncompiled version of the control in your project, as described below:
How to Include a User Control in Your VB Project
This section shows how you can include a custom User Control in your project. If you have the source code for a custom control and would prefer to use that rather than the compiled OCX file (which normally has to be registered), follow the steps below. Once you have included the custom control in your project in this fashion, the code for the control will be interpreted at run-time just like a form or module; when you compile your project into an EXE, the code for the custom control becomes part of that EXE – no separate OCX for that control needs to be included, registered, or distributed with your application. This option is appropriate if, for example, your organization has a policy against using third-party or non-standard controls.
The information presented below is included to demonstrate how an uncompiled custom control can be used in a VB project. You can use this technique for any new projects you may develop where you would like to use TextPlus.
The steps below assume that you have downloaded and unzipped the appropriate files after the purchase of the e-book. From the ..\VB6TUTS\Extras \X14_TextPlus_Custom_Control
folder, copy the files TextPlus.ctl and TextPlus.ctx to the folder where you intend to save the new project. For this example, the files were copied to a folder called MyNewProject.
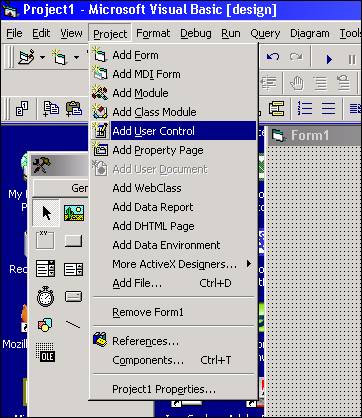
1. Open a new VB project and on the Project menu, select Add User Control:
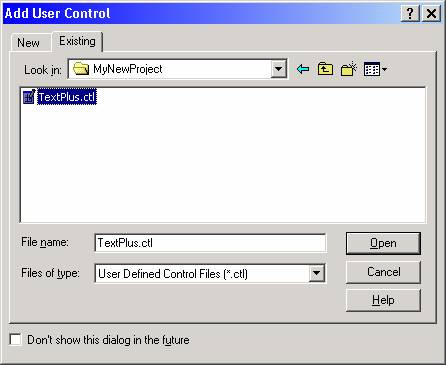
2. The Add User Control dialog box will appear. Click the Existing tab, and navigate to the MyNewProject folder. Select the TextPlus.ctl file, and click Open.
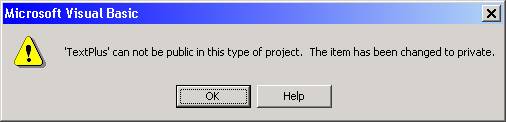
3. If the message shown below appears, click OK.
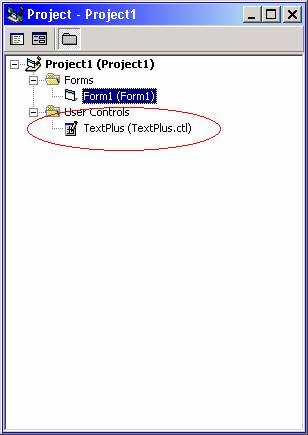
4. The TextPlus control should appear both in your Project Explorer window (under the folder "User Controls") as well as in your toolbox:
|
|
|
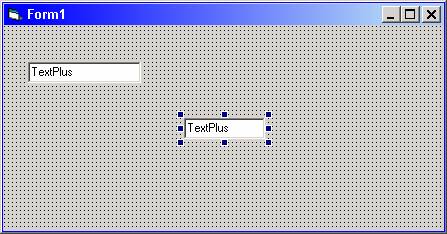
5. At this point, you can use the TextPlus control as you would any other control.