Using Multiple Forms: "Splash Screen" Example
And now on to the Splash Screen example. The idea behind the splash screen example is to introduce the user to the application by showing a form with perhaps a logo or colorful graphic. The splash screen should display for a few seconds and then automatically switch to the application's main screen with no intervention from the user.
To build this sample application, perform the following steps:
- Start a new VB project.
- Set the following properties of the form:
Property Value
(Name) frmSplash
BorderStyle 0 – None
- Place an Image control on the form. (Be sure to use an Image, and not a PictureBox.)
While the PictureBox is a versatile control, more overhead is involved in using it. If all you want to do is display an image, then use the Image control. The PictureBox can also be used to display an image, but it also enables you to use graphics methods and can also serve as container (similar to a Frame) that lets you house other controls. Since we don't want to do any of that stuff and just want to display an image, we'll stick with the Image control.
Resize the Image control to encompass the size of the form. Name the control imgClouds.
Set the Stretch property to True. When the Stretch property is True, the picture you assign to the Image control will automatically expand or contract to conform to the size of the control. When the Stretch property is False, the Image control will automatically resize itself to expand or contract to the size of the picture that is assigned to it.
Set the Picture property. When you click the ellipsis button on the Picture property, a dialog box will open to allow you to navigate your system to find a suitable picture file. The main types of files that can be assigned to an Image control are .bmp, .jpg, .ico, and .wmf. Depending on the OS you are using, the clouds.bmp file may or may not be present on your system. If it is, the most likely place it would be is in either the Windows or WINNT directory. If you cannot find "clouds.bmp", simply navigate your system to locate any file of the appropriate type. Once you find your file, click Open on the dialog box. The picture will then fill the Image control.
- Place a Label on the form, move it to the center of the form and increase its width to encompass the width of the form. Set the properties of the label as follows:
Property Value
Alignment 2 - Center
BackStyle 0 – Transparent
Caption My Cool Application
Font Arial (Bold Italic, Size 24)
- Place a Timer on the form and set its properties as follows:
Property Value
(Name) tmrSplash
Enabled True (the default)
Interval 3000 (3 seconds)
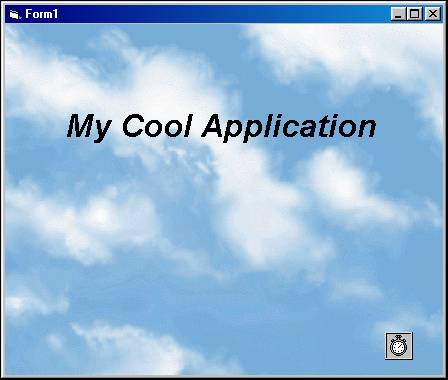
At this point, your form should look something like this:
- From the VB Project menu, choose Add Form and select the option to add a new form. Name the new form frmMain. For the purpose of this demo, you need not place any controls on this form.
- Back on frmSplash, code the tmrSplash_Timer event as follows:
Private Sub tmrSplash_Timer()
tmrSplash.Enabled = False
frmMain.Show
Unload Me
End Sub
- Run the project. The splash screen will display for three seconds and then the main form will be displayed. Close frmMain.
Download the VB project code for the example above here.